
Peter Hopkins
Level II Thermographer
United Infrared
8472 Adams Farm RoadRandleman, NC 27317
888-722-6447 www.unitedinfrared.com
Abstract
Although thermal imaging has long been used in the identification of moisture problems in buildings, it is often not the primary tool utilized due to a perception of high imager costs. Over the past few years, prices on infrared imagers have been tumbling due to the introduction of the microbolometer sensor, mass production, and economies of scale. At present, even entry level IR cameras can perform quite well when it comes to moisture mapping. Due to the effects of evaporative cooling, an IR camera can complement the forensic moisture audit by quickly and non-destructively identifying the location and size of moisture damaged areas. This presentation describes how we were able to incorporate this technology into our business and reviews some of the many cases in which we successfully detected moisture using infrared thermography
Introduction
I have been a building inspector for almost 15 years and have inspected close to 7,000 properties. Infrared thermography has become an indispensible tool in my profession, opening up profitable new business opportunities. Since I have opened my thermal imaging business, I can tell you that the single application of infrared that produces the most money for my company is moisture detection and forensics.
Although thermal imaging has long been used in the identification of moisture problems in buildings, it is not yet the primary tool utilized due to an outdated perception that imager costs are prohibitive. The reality is, over the past few years prices on infrared imagers have tumbled, due mainly to the introduction of the microbolometer sensor and economies of scale. At present, even entry level IR cameras can perform quite well when it comes to moisture mapping.
This paper will describe infrared technology and its moisture applications and how we incorporated this technology into my business by reviewing some of the many cases in which we successfully detected moisture using infrared thermography.
How Infrared Thermography Works
An infrared camera can see and measure heat differences in building materials on ceilings, walls and floors. Wet or moist areas and objects usually have a different temperature than dry areas due to evaporative cooling, increased conductance or thermal capacitance. Accordingly, the wet areas will appear relatively darker or lighter than the dry areas on an infrared picture, enabling us to locate them. An IR camera can complement a forensic moisture audit by quickly and non-destructively identifying the location and size of moisture damaged areas.
Don’t be deluded into thinking this is an easy job. Experience and education play a large role in successfully identifying moisture problems and mapping them to their sources.
Also, thermal images are sometimes deceiving because moist areas can equalize in temperature depending on the time of day or depending on the length of time since moisture first occurred. It takes experience and knowledge to know when other tools, like moisture meters, may be necessary.
We obviously recommend proper training and experience prior to opening shop in the forensic business.
The True Culprits
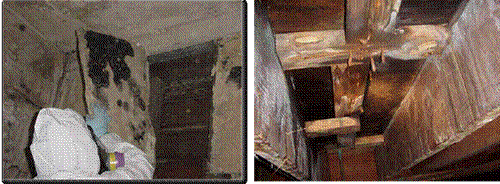
Because of extensive media coverage, people often say their problem is mold, when actually their problem is water, because mold can’t exist without it.
Building leaks are a common condition and are a big fear of real estate investors and buyers because moisture deteriorates building components and creates conditions conducive to mold growth. To reduce or minimize the negative effects of water, it must be controlled in a fashion which doesn’t allow its entry into a building. This is done through proper fenestration and building design.
 |
|
|
Mold damage
|
Subfloor damage due to leak
|
Therefore, the true culprits of moisture damage are design flaws, construction defects and mechanical or plumbing mistakes which allow for the intrusion of water. And a structure’s age is definitely a factor too as components start to wear, like caulking and mastic, and in these cases deferred maintenance would be the true cause of a leak.
However, with the right amount of water and the right wind speed, moisture can sometimes find its way through even the tightest locations.
 |
||
|
Roof with no
proper counterflashing |
Roof not pitched properly
to drain (holding water) |
Plumbing fixture leak
|
The Problem and the Solution
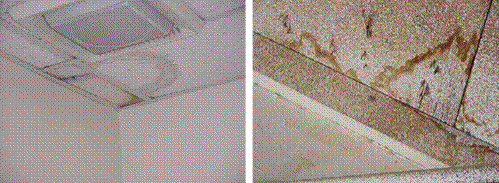
The problem for most investors and buyers in a real estate transaction is identifying or uncovering the deficiencies in a property, so many people hire a property inspector when they are purchasing a home or building. The inspector performs a visual evaluation of the property and identifies conditions indicative of hazards and problems.
Real estate inspectors are often revered as a “general practitioner” or “jack of all trades” and specializing in one application like moisture is not typically their role nor are they typically paid for forensic investigations on a general site overview. For example, they can identify areas of moisture staining or damage but this is where their investigation typically stops, with a recommendation for further review by a specialist.
Remember, the inspector has proposed a fee to the client in accordance with their standards of practice, so obviously, additional time invested in an analysis, like uncovering the root cause of a stain, would yield additional liability without compensation for time. For this reason, for an additional fee, many inspectors are now also offering forensic services or forming a separate company that offers forensic evaluations with specialized tools like infrared cameras and moisture meters. By contracting yourself or another specialist to identify the source of moisture problems, you are in fact minimizing your risk as a building inspector.
I operate a very diverse thermal imaging company and have inspected everything from houses to horses, but for many years, I left money on the table every time I identified a stain on a home inspection and recommended they find someone else to complete the job. This is not the case anymore as my clients retain my infrared moisture services at an additional fee to help them solve their mystery.
 |
|
|
Ceiling stain
|
Stain |
Case Studies
Why is My Wall Wet?
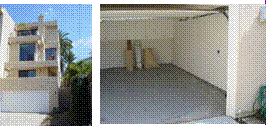
A home in a San Diego coastal community was up for sale and a home inspection had been performed in which stains were identified on a garage wall and so were some elevated moisture readings there as well. As is common with most home inspections, it was now left to the buyer and seller of the home to figure out where these mystery stains came from. My company was retained in an effort to identify the cause.
Upon arrival at the home, we were given the typical tour along with explanations as to what they suspected. Our review began with a visual inspection of the property to check for any possible conditions that may have led to the elevated moisture.
  |
|||
| Exterior visual of this steep hillside home |
Visual of garage where elevated moisture was noted |
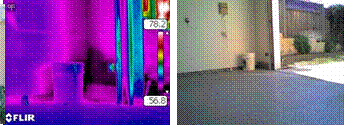
Thermal image showing wet area of wall |
Visual |
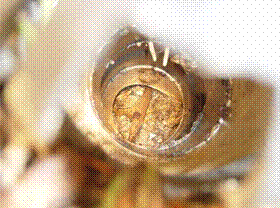
Upon review of the exterior and moisture mapping the interior of the unit, we were able to identify the root cause of the moisture: The exterior drainage system was improperly designed and was clogged at the time of the inspection causing leakage and excessive water at foundation. The soil was allowing water to build up against the structure and the waterproofing was failing.
As additional waterproofing would be difficult, it was our recommendation to properly repair the grade of the home, clean the drainage, install gutters and consider hardscape next to the home to minimize future moisture intrusion. This, of course, in addition to remediation of the wet areas.
You Want Me to Replace My Roof Again????
In this case, the homeowner had already replaced the roof three times in an effort to cure an ongoing leak. Now their roofing contractor was insisting that replacing an upper section of the roof would fix the leak but the wary owner wanted to try our services first.
When we arrived, we found the usual assortment of buckets on the floor. After talking to the owner about the problem, we turned our camera on and went to work. Though you may not be able to see it in photograph (A), there was a slight bulge in the drywall ceiling but no other signs of moisture. The moisture meter, however, read off the scale when placed on this spot (B), and an IR image (C) showed a concentration of moisture.
It turned out the suggested roof repair by local roofing contractor would not have solved the problem as the true issue was poor roof design of the flashing detail as you can see in image (D). In heavy rains, water from the upper roof cascaded onto the lower steep-pitched roof, where it was directed against the building and under the poorly designed counter flashing on the wall, eventually finding its way into the living room ceiling.
Our recommendation was to install a new wide cricket flashing, taller counter flashing, and gutters on the upper roof to redirect the bulk of the water.
 |
|||
|
Problem room (A) |
Buckets on the floor ready to catch |
(B) Moisture meter 100% readings |
(C) Infrared image showing clearly the water |
As with any job, it is always important to listen to the client’s concerns so you can properly address them. In this case, they knew there was a leak but the actual cause of the leak was not known and up until now, the client had spent close to $5,000 in repairs that didn’t work.
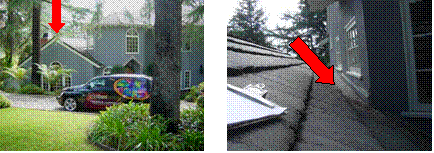 |
|
|
Front House Picture
|
(D) Arrow showing point of water
entry at flashing |
Is This a Plumbing or a Building Leak?
Many times we are retained by general contractors after they have exhausted all efforts to identify the root cause of a leak. In this case, we were retained by a builder to review a newer home that had elevated moisture at the floor area of a basement living space. The builder had installed a hydronic heating system in the slab and that is what was suspected as the source of elevated moisture.
Upon arrival at residence, we went through our normal interview with clients to discuss their concern and known conditions. The contractor showed me several areas of the room where they had cut out sections of the drywall to expose the wall and where they had even pulled back carpet in areas and broke out portions of the concrete around the radiant plumbing to see if elevated moisture was seen.
 |
|||
| Basement room | Openings in walls made |
Carpet was pulled back in areas |
Portions of slab chipped away in areas of high moisture. Notice the red pipe in slab (radiant heating) |
Upon review of some of the cut outs and consulting with the radiant heating contractor, it became apparent that the leak was caused by exterior features versus a sub-surface or slab related moisture issue.
With our thermal imager we were able to see the radiant heating in the slab very clearly but did not identify any areas indicative of a leak. When we imaged the openings in the wall we were able to identify a trough that went around the basement slab. This trough was installed by the builder to catch any basement wall leakage that may occur.
We proceeded to do moisture mapping in the residence and found elevated moisture readings at the perimeter slab but none in the middle of the room which helped further our suspicion that it was an exterior grade related condition.
Our inspection then went to the exterior of the building where we identified several conditions that appeared to be contributing to the problem like improperly sloped hardscape, to caulking and weather proofing problems.
In an effort to identify the problem, we proceeded to prepare the residence for water testing and proper analysis. We made some strategic wall openings in areas where we suspected the water was coming in and then proceeded to water test at the exterior grade. Within minutes the water was identified coming in at the basement wall exactly where we suspected.
It turns out the water was entering at specific locations on the exterior and travelling down the interstitial space between the basement framed wall and the basement wall. The water was traveling down to the trough area which was acting as a gutter which caused the elevated moisture readings at the perimeter of the slab.
As you can see, this case got solved but as a point in this matter, experience played the bigger part in the proper identification of where the water was actually coming from and not an infrared camera…however the camera played the most important part of all….getting us the job!
 |
|||
| Negative slope | Openings at exterior lacking proper sealant | Opening of wall to prepare for testing | Leakage |
The Stain is Here But the Leak is Over There?
This was one of my favorite moisture jobs because what we were hired to test and what ended up being the problem were two different things.
We were retained by a general contractor to help identify a mystery leak in a home. We were told that it was suspected that the roof was the culprit. At the return wall at the bottom of the stairway was a small section of wall that had some indications of moisture. A bathroom was located above this area but the general contractor stated that recent repairs to plumbing supply lines to the tub were done and it was not leaking, hence their belief it was the roof.
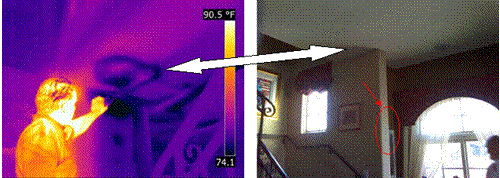 |
|
|
Thermal
|
Visual (arrow shows where
only visible stain was noted) |
Upon arrival we did our normal routine and documented conditions and took moisture readings but when we turned on our infrared camera, we saw the true problem. There was no visible moisture at the ceiling but we quickly confirmed the wet area with our thermal camera. This led us back to the tub but we decided to confirm our suspicions with a quick water test of the tub upstairs. We tested the tub with hot water and within minutes, we were able to see water coming down the return wall.
We followed the moisture path and saw how that wall leads right back to where the tub drain is…voilà! case solved.
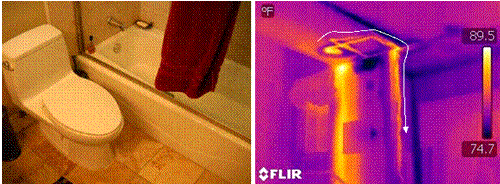 |
|
|
Bathroom above
|
Water testing showing water travel
|
Five Year Mystery
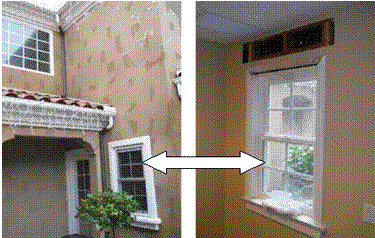
We had a recent case in December 2010 where we were contacted after a series of large storms that hit our Southern California Region. An owner of a home had exhausted all efforts after having an area fixed 2 times previously over a five year period and finding a leak that continued to occur. The owner complained of dripping water at a lower office window in his home. The home was built approximately 5 years prior and shortly after construction, they identified this leak. The builder returned to re-flash the exterior only to find 2 years later the leak reappeared. The builder returned to perform repairs at that time only find out 3 years later that the leak still existed, which is when my company was retained to find the true culprit.
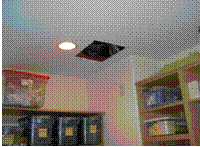
As per our normal protocol, we do a visual walk of the property to discuss the client’s concerns and then to document known conditions prior to any water testing or destructive testing. The owner had already cut open portions of the wall trying to figure out the problem to no avail.
 |
 |
|
|
Exterior View
|
Interior View. Owner opened up portions of wall to find leak. | 2nd story above bedroom closet suspected and owner cut holes in ceiling looking for source. |
Visually, we were able to identify the moisture was currently at the office window as it had just been raining. On the exterior view, we were able to identify conditions that appeared were promoting the water such as the downspout diverting upper roof water directly to this area. Our immediate suspicion was the flashing detail at the wall where the lower roof ends. The sidewall counter flashing appeared short and with the extensive amount of water that can occur in this area, we were immediately focused on the probable source.
 |
|||
| Thermal | Visual | Moisture meter reading | Visual |
Now that we have mapped the moisture, it is our job to now confirm the problem and our suspicion. We informed the owner that we would like to open up the ceiling further and water test the stucco area that we suspected.
 |
||
| Water testing suspected area |
Cutting openings in ceiling |
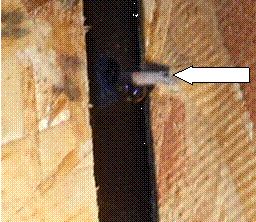
Visual showing nail penetration |
Water testing of the residence at the lower suspected area and having opened up the ceiling allowed us to confirm our suspicions. It appeared that the contractor had penetrated areas of building paper which were allowing moisture to come into the residence. Although they had come at previous times to repair, as mentioned earlier in this paper, it is only a matter of how much water had to saturate the stucco before it would appear and in this case….5 minutes of water did the trick.
Summary
I hope you have been enlightened to the opportunities that are ahead for you in the moisture locating business. My recommendation for you is that if you do not have a good background in building science that you stick to the Moisture Mapping business (simply confirming whether areas are wet or not), but if you have been in construction or have been inspecting for some time and have experience under your belt then maybe you are ripe to get some training on how to expand your business into forensics.
Acknowledgements
I would like to thank IR/INFO for allowing me an opportunity to present this paper and to the Seffrin’s for their continued support in the advancement of thermography.
I have learned much from attending these conferences and how the diversity of infrared continues to grow. Infrared opportunities are very much in an infancy stage so I am very honored to help advance this industry.
About the Author
Peter Hopkins has operated a successful home inspection company since 1996 (www.inspecdoc.com) and has personally performed close to 7,000 property inspections. His company expanded into IR thermography in 2005, with the opening of SoCal Infrared (www.socalinfrared.com) and has found success in many areas of diversification. Peter is the co-founder of United Infrared (www.UnitedInfrared.com), a national network of contract thermographers which includes application-specific training and business coaching in a multitude of applications related to infrared technology, thus allowing the thermographer opportunities to further develop their business. Peter is an ICC Code Certified Building Inspector and Certified HERS Energy Rater. He has been trained in Equine Thermography and is licensed with the California Horse Racing Board as an Assistant to Veterinarians. Peter Hopkins lives in Southern California with his wife Anna and their two children.


